Adobe have just released an update to Photoshop CC which includes the new tool Select Subject. In one click this tool will make a selection of a prominent subject in your image with the help of Adobe's AI technology Adobe Sensei.
As some of our client work requires us to separate the background from the subject of an image, we thought we'd take a deeper look into this new tool and share our results with you. If you are currently working to remove a background from an image and the new Select Subject tool isn't quite doing the job, we also touch on the Magic Wand and Quick Selection Tools as alternative approaches for different image types.
Stay tuned for our next blog post where we will be taking you through Photoshop's Select & Mask tool and some other ways to separate backgrounds using channels and the pen tool.
Using Select Subject in Photoshop
Select subject is very easy to use and can be accessed using any of the following methods:
1. Select > Subject.
2. With Quick Selection or Magic Wand activated, click Select Subject in the options bar.
3. While using Quick Selection during Select & Mask, click Select Subject in the options bar.
When used, the tool is able to find a variety of objects in an image and isolate them. In their user guide, Adobe encourages the user to refine the initial selection by using the other selection tools available, but for now we will try the tool on it's own to see just how accurate it is.
Here are some tests we did on a variety of images:


The results with the bird are interesting because I would probably be able to get a better selection by just using the Quick Selection tool. It has left out a lot of space in between the feathers of the wings.

The tool seems to do a reasonably good job in selecting the main bulk of the subject, but starts to struggle around thin areas of background and sometimes completely mistakes background for subject. In our first image, there is still blue sky in between her arms, fingers and hair. Certain features like hair will always require more manual work, but this tool would still improve work flow by giving the user a good place to start. As mentioned above, Adobe recommends refining the selections by using the other available tools.
To anyone new to Photoshop, below you will find some simple guides on using the Magic Wand and Quick Selection tools to create selections and remove backgrounds with your images.
Alternative 1 - Magic Wand Tool
If you have an image with a clear and solid background, the magic wand tool can give you a nice and quick result. The Magic Wand selects pixels based on the colour and tone of your image. This works best when there is a clear difference between your target and your background.
The process behind using this tool is to simply use it to cut out the background and leave the target image behind.
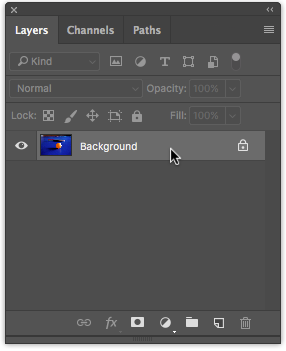
Firstly, go to the layer panel on the right and unlock the background by double clicking on the layer and then "Ok". The layer is locked with the aim that you will protect the basic image and use other layers to edit. For the purpose of this demonstration we will unlock the original layer.
Find the Magic Wand Tool over on the left by holding down on Quick Selection Tool and moving to the Magic Wand Tool.

Select colour areas
You will see a tool bar at the top of the page showing some options.
Sample Size is used to set the initial colour used to compare with. If you have a noisy image, selecting an average area could work better than selecting a single pixel.
Tolerance should be set to around 32 by default. This determines how many colours will be selected in relation to the colour you click on. For example, if the number is set to 0, it will only select the colour you have clicked on. We need some tolerance as there are many different hues of blue within our background.
Anti-alias allows the tool to add semitransparent pixels along the edges, producing smoother results.
Contiguous will limit the selection to only areas that are connected to the pixel you click on. If contiguous is unchecked the tool will also select similar colours that are not connected.
Sample All Layers is exactly what it says. Leave this unchecked to select only the colours on your current layer.

Once you have set the toolbar options, simply click anywhere on the background to reveal marching ants around the edge of your target and background. This is your current selection.
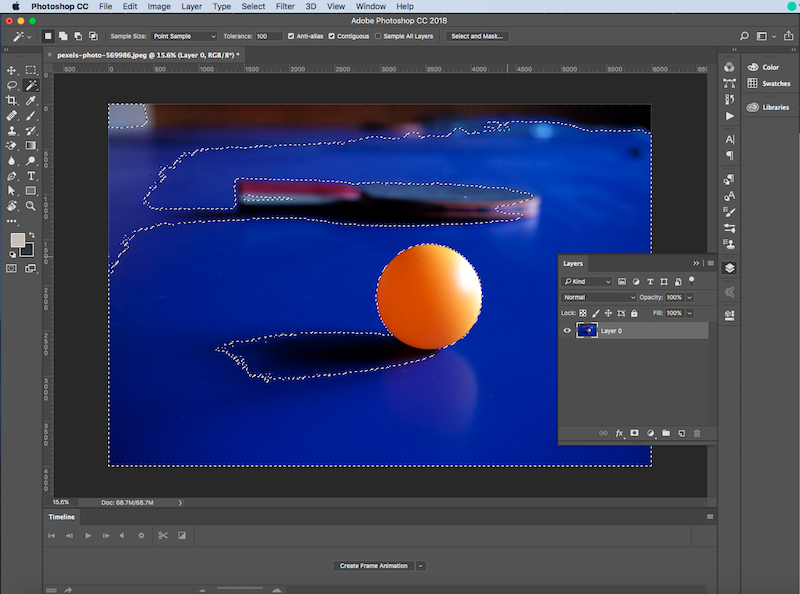
In the example, there are various shades of blue and even some reds and blacks which were left out of the selection. If there are areas remaining you can hold down your shift key and click on these areas to add to your selection. A small (+) will appear on your wand icon when adding to a selection. Increasing tolerance can also help at this point.

Once my entire background is selected, I can remove it by deleting or I can go to Select > Inverse. My selection will now be on the subject instead of the background, where I can copy the subject to a new layer with shortcut Command + J (mac) or Control + J (windows).
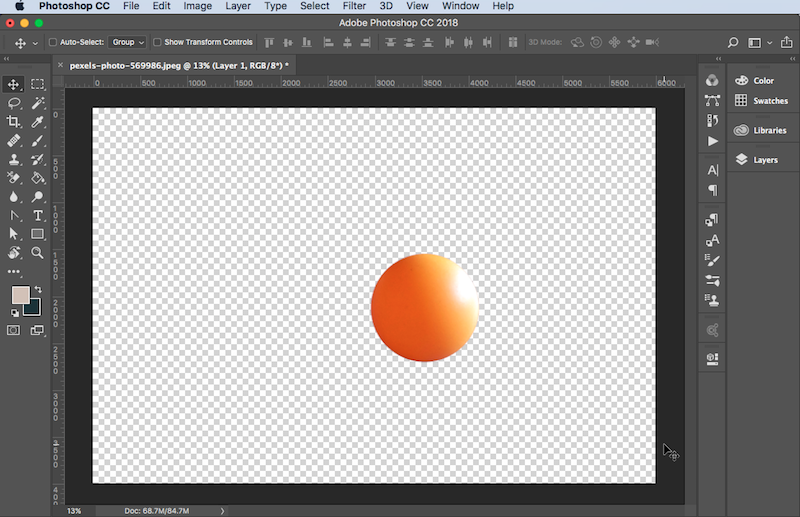
Selecting background over target
Your selection should depend on the complexity of your target versus your background. In my example, the background and the ball are not very complex, so selecting either would be fine. However, if you were working with an image containing a clear blue sky and some detailed buildings, it would be much easier to select the sky.
If you duplicated your original image, you would be safe in just deleting the selected area.
If on the other hand you are working on your original image, it would be wise to copy your area on to a new layer.
Alternative 2 - Quick Selection Tool
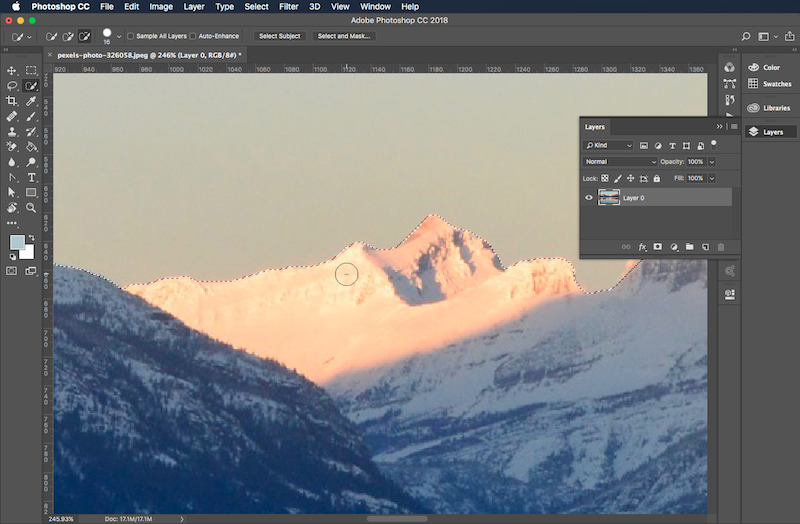
The Quick Selection tool can be used to make a selection by dragging a brush across an area. This also works at it's best when there is a very clear and defined edge to what you want to select.
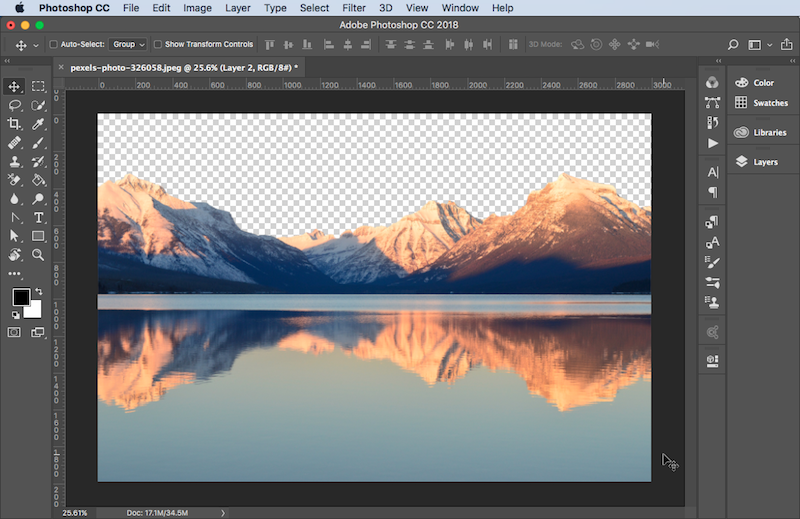
In this case, it will be the sky behind our mountains.
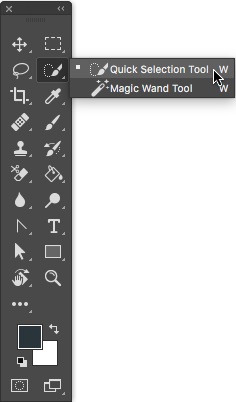
If you head over to the top toolbar you will see a range of options.
While using the tool, the + will add a selection and the - will remove a selection. Use the ( [ ) and ( ] ) brackets to decrease and increase the brush size. We will leave Sample All Layers unchecked. Auto-Enhance will reduce the roughness around your selection edges but this will also be left unchecked for now.
![If you head over to the top toolbar you will see a range of options.
While using the tool, the + will add a selection and the - will remove a selection. Use the ( [ ) and ( ] ) brackets to decrease and increase the brush size. We will leave Sample All Layers unchecked. Auto-Enhance will reduce the roughness around your selection edges but this will also be left unchecked for now.](/sites/default/files/media-uploads/Quick%20Selection%202.png)
To make a selection, simply click and drag across the area.
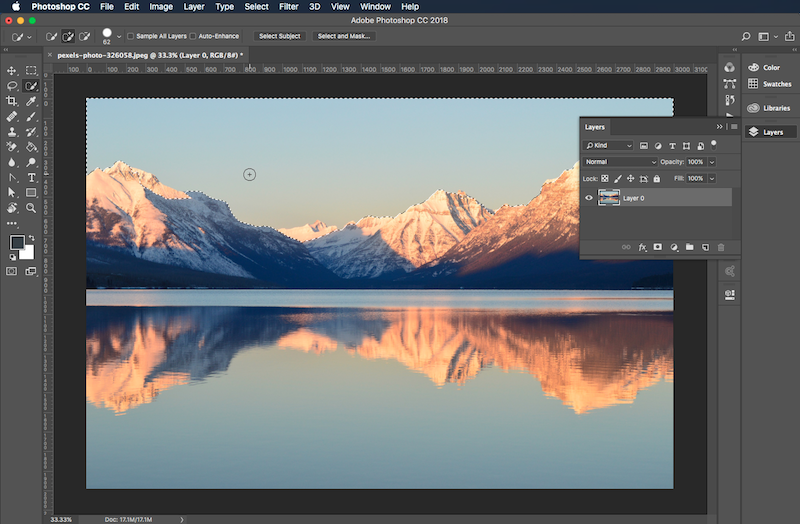
Fill in any remaining gaps and if it selects more than you intended, hold the alt key to change from plus to minus, then click to adjust your selection. When you are happy you can delete the background or go to Select > Inverse, then copy the subject to a new layer with shortcut Command + J (mac) or Control + J (windows).
